GoogleTest User’s Guide官方教程
Unit Testing C++ with Google Test,以及配套视频。教程简洁明了,非常推荐
安装
在任意文件夹下打开终端,安装并编译gtest,并将产生的库拷贝到/usr/lib中
sudo apt-get install libgtest-dev
sudo apt-get install cmake
cd /usr/src/gtest
sudo cmake CMakeLists.txt
sudo make
sudo cp *.a /usr/lib
gtest的使用示例
What is the difference between TEST, TEST_F and TEST_P?
- TEST() is useful when you want to write unit tests for static or global functions or simple classes. Example test
- TEST_F() is useful when you need access to objects and subroutines in the unit test (F is for fixture). Example test
- TEST_P() is useful when you want to write tests with a parameter. Instead of writing multiple tests with different values of the parameter, you can write one test using TEST_P() which uses GetParam() and can be instantiated using INSTANTIATE_TEST_SUITE_P(). Example test
接下来,我们根据几个示例来说明其用法。
测试用例:使用宏TEST()进行单元测试
函数功能:实现一个开方根函数,并对其测试
在自定义的C++项目目录下测试一个开方根函数(如CLionProjects/gtest1).在该目录下构建以下文件:
touch sqrt.cpp
touch sqrt_test.cpp
touch CMakeLists.txt- sqrt.cpp中有一个
squareRoot()函数,用于实现开方功能
#include <math.h>

// Get the Square root of a number.
double squareRoot(const double a)
    {
    double b = sqrt(a);
    if(b != b) // NaN check
        { return -1.0; }
    else
        { return sqrt(a); }
}- sqrt_test.cpp用于测试sqrt.cpp中的
squareRoot()函数是否正确- 这里需要把测试的头文件
#include <gtest/gtest.h>和源文件#include "sqrt.cpp"包含进去 - 构建两个测试:
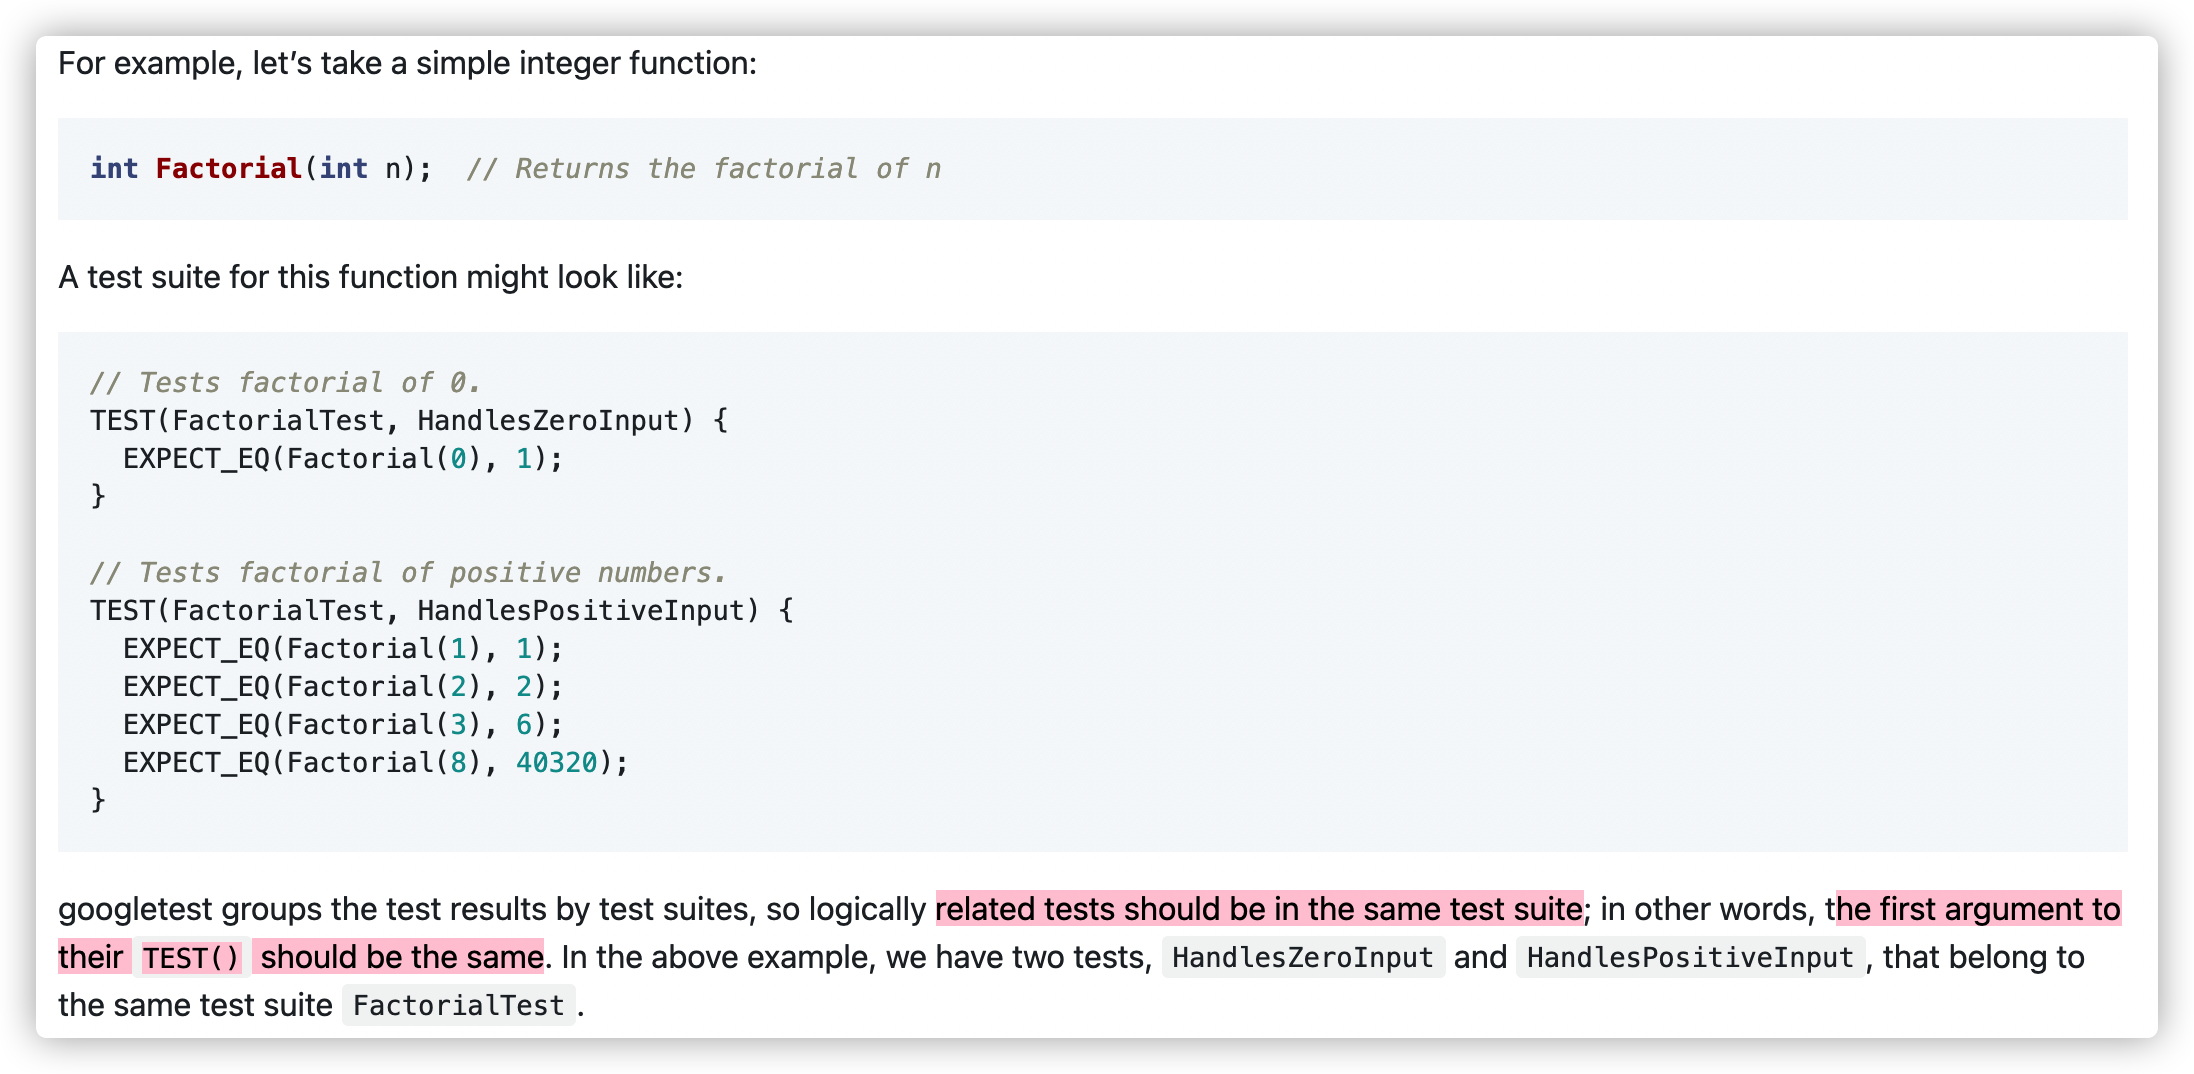
TEST(SquareRootTest, PositiveNos)和TEST(SquareRootTest, NegativeNos)TEST(TestSuiteName, TestName):The first argument is the name of the test suite, and the second argument is the test’s name within the test suite. .Tests from different test suites can have the same individual name.TEST()的参数名称可以随意取,但尽量与真实含义相符。比如我们给测试取一个SquareRootTest名称,如果函数squareRoot参数是正数,则对其开方(相应地,构建TEST(SquareRootTest, PositiveNos));如果是负数,则返回-1(相应地,构建TEST(SquareRootTest, NegativeNos)).;名称必须是有效的C++标识符,且不能有下划线。
ASSERT_EQ(expected, actual);
- 这里需要把测试的头文件
#include "sqrt.cpp"
#include <gtest/gtest.h>

TEST(SquareRootTest, PositiveNos)
    {
    ASSERT_EQ(6, squareRoot(36.0));
    ASSERT_EQ(18.0, squareRoot(324.0));
    ASSERT_EQ(25.4, squareRoot(645.16));
    ASSERT_EQ(0, squareRoot(0.0));
    }

TEST(SquareRootTest, NegativeNos)
    {
    ASSERT_EQ(-1.0, squareRoot(-15.0));
    ASSERT_EQ(-1.0, squareRoot(-0.2));
    }
//  测试的主函数
int main(int argc, char **argv)
    {
    testing::InitGoogleTest(&argc, argv);
    return RUN_ALL_TESTS();
}- CMakeLists.txt中负责关联文件并构建测试的可执行文件
executeTests
cmake_minimum_required(VERSION 2.6)

# Locate GTest
find_package(GTest REQUIRED)
include_directories(${GTEST_INCLUDE_DIRS})

# Link runTests with what we want to test and the GTest and pthread library
add_executable(executeTests sqrt_test.cpp)
target_link_libraries(executeTests ${GTEST_LIBRARIES} pthread)- 运行可执行文件
cmake CMakeLists.txt
make
./executeTests

// 或者新建一个build文件夹,在该文件夹下编译
// mkdir build
// cd build
// cmake ..
// make
// ./executeTests
最后的结果为:

测试用例:使用宏TEST_F()进行单元测试
函数功能:用相同的数据,实现加法和乘法的同时测试
TEST_F()中的F是fixture的意思,适用于测试数据被多次使用的场景(或者不同数据执行很类似的行为,如100+5,100+10)。比如有两个数x和y,分别需要验证它们的加法和乘法行为,TEST_F()可以共用一份测试数据,避免不同的测试行为重复创建数据。
在自定义的C++项目目录下创建文件(如CLionProjects/gtest2)
加法及加法测试
- 构建头文件Addition.h
#ifndef GTEST2_ADDITION_H
#define GTEST2_ADDITION_H

class Addition {
public:
    static int twoValues(const int x, const int y);
};
#endif //GTEST2_ADDITION_H- 构建源文件Addition.cpp
#include "Addition.h"
int Addition::twoValues(const int x, const int y) {
    return x+y;
}- 构建测试文件Addition_Test.cpp
- AdditionTest类继承::testing::Test
- 注意要包含
#include "Addition.cpp"和#include <gtest/gtest.h> TEST_F(TestFixtureName, TestName):第一个参数必须是测试类名,第二个参数为TestName.- For each test defined with TEST_F(), googletest will create a fresh test fixture at runtime, immediately initialize it via SetUp(), run the test, clean up by calling TearDown(), and then delete the test fixture. Note that different tests in the same test suite have different test fixture objects, and googletest always deletes a test fixture before it creates the next one. googletest does not reuse the same test fixture for multiple tests. Any changes one test makes to the fixture do not affect other tests.
#include "Addition.cpp"
#include <gtest/gtest.h>
// 继承::testing::Test
class AdditionTest : public ::testing::Test{
protected:
    virtual void SetUp(){};
    virtual void TearDown(){};
};

TEST_F(AdditionTest,twoValues){
    const int x=4;
    const int y=5;
    Addition addition;
    EXPECT_EQ(9,addition.twoValues(x,y));
    EXPECT_EQ(5,addition.twoValues(2,3));
}
乘法及乘法测试
- 构建头文件Multiply.h
#ifndef GTEST2_MULTIPLY_H
#define GTEST2_MULTIPLY_H
class Multiply {
public:
    static int twoValues(const int x, const int y);
};
#endif //GTEST2_MULTIPLY_H- 构建源文件Multiply.cpp
#include "Multiply.h"
int Multiply::twoValues(const int x, const int y) {
    return x*y;
}- 构建测试文件Multiply_Test.cpp
- 注意要包含
#include "Multiply.cpp"和#include <gtest/gtest.h>
- 注意要包含
#include "Multiply.cpp"
#include <gtest/gtest.h>

class MultiplyTest : public ::testing::Test{
protected:
    virtual void SetUp() {};

    virtual void TearDown() {};
};

TEST_F(MultiplyTest, twoValues) {
    const int x = 4;
    const int y = 5;
    Multiply multiply;
    EXPECT_EQ(20, multiply.twoValues(x, y));
    EXPECT_EQ(6, multiply.twoValues(2, 3));
}
加法和乘法汇总后一起测试
- 构建Main_TestAll.cpp
- 注意要把
#include "Addition_Test.cpp",#include "Multiply_Test.cpp"和#include <gtest/gtest.h>包含进去
- 注意要把
#include "Addition_Test.cpp"
#include "Multiply_Test.cpp"
#include <gtest/gtest.h>
int main(int argc,char ** argv){
    testing::InitGoogleTest(&argc,argv);
    return RUN_ALL_TESTS();
}- CMakeLists.txt文件
cmake_minimum_required(VERSION 3.10)
project(gtest2)

set(CMAKE_CXX_STANDARD 14)
#加载相关的头文件和库文件
find_package(GTest REQUIRED)
include_directories(${GTEST_INCLUDE_DIRS})

#加法和乘法都测试
add_executable(executeTests Main_TestAll.cpp)
target_link_libraries(executeTests ${GTEST_LIBRARIES} pthread)- 编译并运行
cmake CMakeLists.txt
make
./executeTests
最后结果为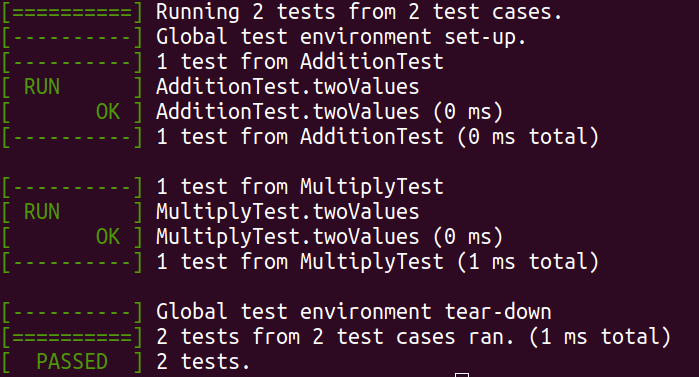
如果要单独测试,比如只测试加法,则在Addition_Test.cpp中添加测试的main函数。并修改对应的CMakeLists.txt即可
- Addition_Test.cpp
#include "Addition.cpp"
#include <gtest/gtest.h>

class AdditionTest : public ::testing::Test{
protected:
    virtual void SetUp(){};
    virtual void TearDown(){};
};

TEST_F(AdditionTest,twoValues){
    const int x=4;
    const int y=5;
    Addition addition;
    EXPECT_EQ(9,addition.twoValues(x,y));
    EXPECT_EQ(5,addition.twoValues(2,3));
}
int main(int argc,char ** argv){
   testing::InitGoogleTest(&argc,argv);
   return RUN_ALL_TESTS();
}
- CMakeLists.txt文件
cmake_minimum_required(VERSION 3.10)
project(gtest2)

set(CMAKE_CXX_STANDARD 14)
#加载相关的头文件和库文件
find_package(GTest REQUIRED)
include_directories(${GTEST_INCLUDE_DIRS})

##单独测试加法
#add_executable(exec1 Addition_Test.cpp)
#target_link_libraries(exec1 ${GTEST_LIBRARIES} pthread)
测试用例:使用宏TEST_P()进行单元测试
加法测试
函数功能:写一个加法函数,然后对其测试
- 构建文件demo1_test.cpp
#include <gtest/gtest.h>
//加法函数
int add(int x, int y) {
    return x+y;
}

TEST(Addition, CanAddTwoNumbers){
    EXPECT_TRUE(add(2,2)==4); // 调用加法函数

//    如果产生错误,则输出相关的错误信息
//    如EXPECT_EQ(2, add(2,2)) << "Two plus two must equal four"; 因为2!=4,则输出"Two plus two must equal four"
    EXPECT_EQ(4, add(2,2)) << "Two plus two must equal four";
}

int main(int argc, char ** argv){
    testing::InitGoogleTest(&argc, argv);
    return RUN_ALL_TESTS();
}- 构建文件CMakeLists.txt
cmake_minimum_required(VERSION 3.10)
project(gtest3)
set(CMAKE_CXX_STANDARD 14)
#加载gtest相关的头文件和库文件
find_package(GTest REQUIRED)
include_directories(${GTEST_INCLUDE_DIRS})

# 简单的TEST用例
add_executable(demo1 demo1_test.cpp)
target_link_libraries(demo1 ${GTEST_LIBRARIES} pthread)
最终结果为: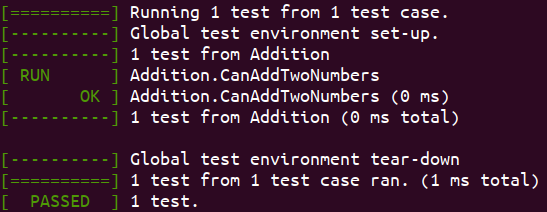
函数功能:模拟ATM机的存取款及查询余额的功能
- 构建文件demo2_bank.cpp
- 展示了
TEST(),TEST_F()TEST_P()的简单用法
- 展示了
#include <gtest/gtest.h>
#include <ostream>

using namespace std;

//========================TEST()的使用=========================

//构建一个账户类。余额初始话为0,该账户有存取款功能
struct BankAccount {
    int balance = 0;

    BankAccount() {}

    explicit BankAccount(const int balance) : balance(balance) {}

//    存款后,余额增加
    void deposit(int amount) {
        balance += amount;
    }

//    如果取款金额小于余额,则取款成功,返回true.否则返回false
    bool withdraw(int amount) {
        if (amount <= balance) {
            balance -= amount;
            return true;
        }
        return false;
    }
};
//测试账户初始余额是否为0
TEST(AccountTest, BankAccountStartsEmpty) {
    BankAccount account;
    EXPECT_EQ(0, account.balance);
}
//========================TEST_F()的使用=========================

//想重复使用BankAccount类。于是构建一个BankAccountTest,并继承testing::Test
struct BankAccountTest : public testing::Test {
    BankAccount *account;

//    新建账户
    BankAccountTest() {
        account = new BankAccount;
    }

//    删除账户
    virtual ~BankAccountTest() {
        delete account;
    }

};
//第一个参数必须是类名。测试账户余额是否初始化为0
TEST_F(BankAccountTest, BankAccountStartsEmpty) {
    EXPECT_EQ(0, account->balance);
}
//第一个参数必须是类名。测试是否存钱成功
TEST_F(BankAccountTest, CanDepositMoney) {
    account->deposit(100);
    EXPECT_EQ(100, account->balance);
}

//========================TEST_P()的使用=========================

//构建一个账户状态的类(结构体)
struct account_state {
    int initial_balance; // 初始金额
    int withdraw_amount; // 取钱金额
    int final_balance; //   最终金额
    bool success; //   是否取钱成功

    friend ostream &operator<<(ostream &os, const account_state &state) {
        os << "initial_balance: " << state.initial_balance
           << " withdraw_amount: " << state.withdraw_amount
           << " final_balance: " << state.final_balance
           << " success: " << state.success;
        return os;
    }
};

//继承BankAccountTest类,以便使用account
//继承testing::WithParamInterface<参数> ,这里的参数指定为账户状态account_state
struct WithdrawAccountTest : BankAccountTest, testing::WithParamInterface<account_state> {
    WithdrawAccountTest() {
        account->balance = GetParam().initial_balance; //GetParam()来调用相应的账户状态
    }
};

//第一个参数必须是类名。测试最终余额
TEST_P(WithdrawAccountTest, FinalBalance) {
    auto as = GetParam();
    auto success = account->withdraw(as.withdraw_amount);//    需要取出 as.withdraw_amount 块钱,测是是否成功
    EXPECT_EQ(as.final_balance, account->balance);
    EXPECT_EQ(as.success, success);
}

//TEST_P不能直接运行,需要用INSTANTIATE_TEST_CASE_P给它指定相应的参数
INSTANTIATE_TEST_CASE_P(Default, WithdrawAccountTest,
                        testing::Values(
                                account_state{100, 50, 50, true},
                                account_state{100, 200, 100, false}
                        )); // 可以从100中取出50;不可以从100中取出200.这里没有用到final_balance


int main(int argc, char **argv) {
    testing::InitGoogleTest(&argc, argv);
    return RUN_ALL_TESTS();
}
- 构建文件CMakeLists.txt
cmake_minimum_required(VERSION 3.10)
project(gtest3)
set(CMAKE_CXX_STANDARD 14)
#加载gtest相关的头文件和库文件
find_package(GTest REQUIRED)
include_directories(${GTEST_INCLUDE_DIRS})

# 简单的TEST,TEST_F,TEST_P用例
add_executable(demo2 demo2_bank.cpp)
target_link_libraries(demo2 ${GTEST_LIBRARIES} pthread)
最终结果为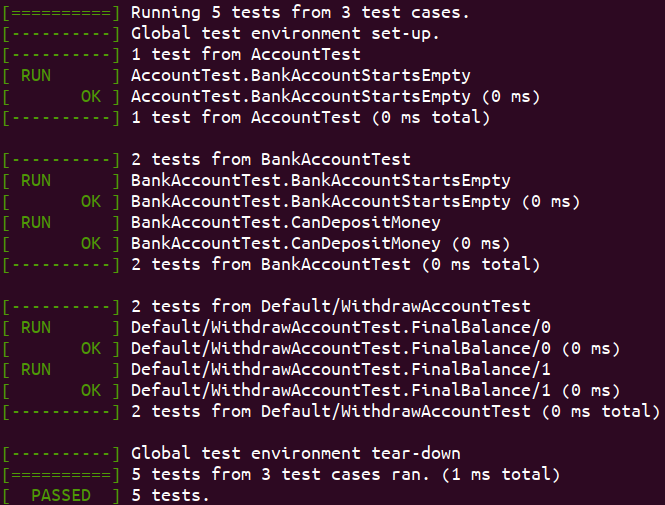
附录
官方文档GUIDES
Googletest Primer
Googletest Primer的中文翻译版
- ASSERT_ versions generate fatal failures when they fail, and abort the current function. EXPECT_ versions generate nonfatal failures, which don’t abort the current function. Usually EXPECT_ are preferred, as they allow more than one failure to be reported in a test. However, you should use ASSERT_ if it doesn’t make sense to continue when the assertion in question fails.
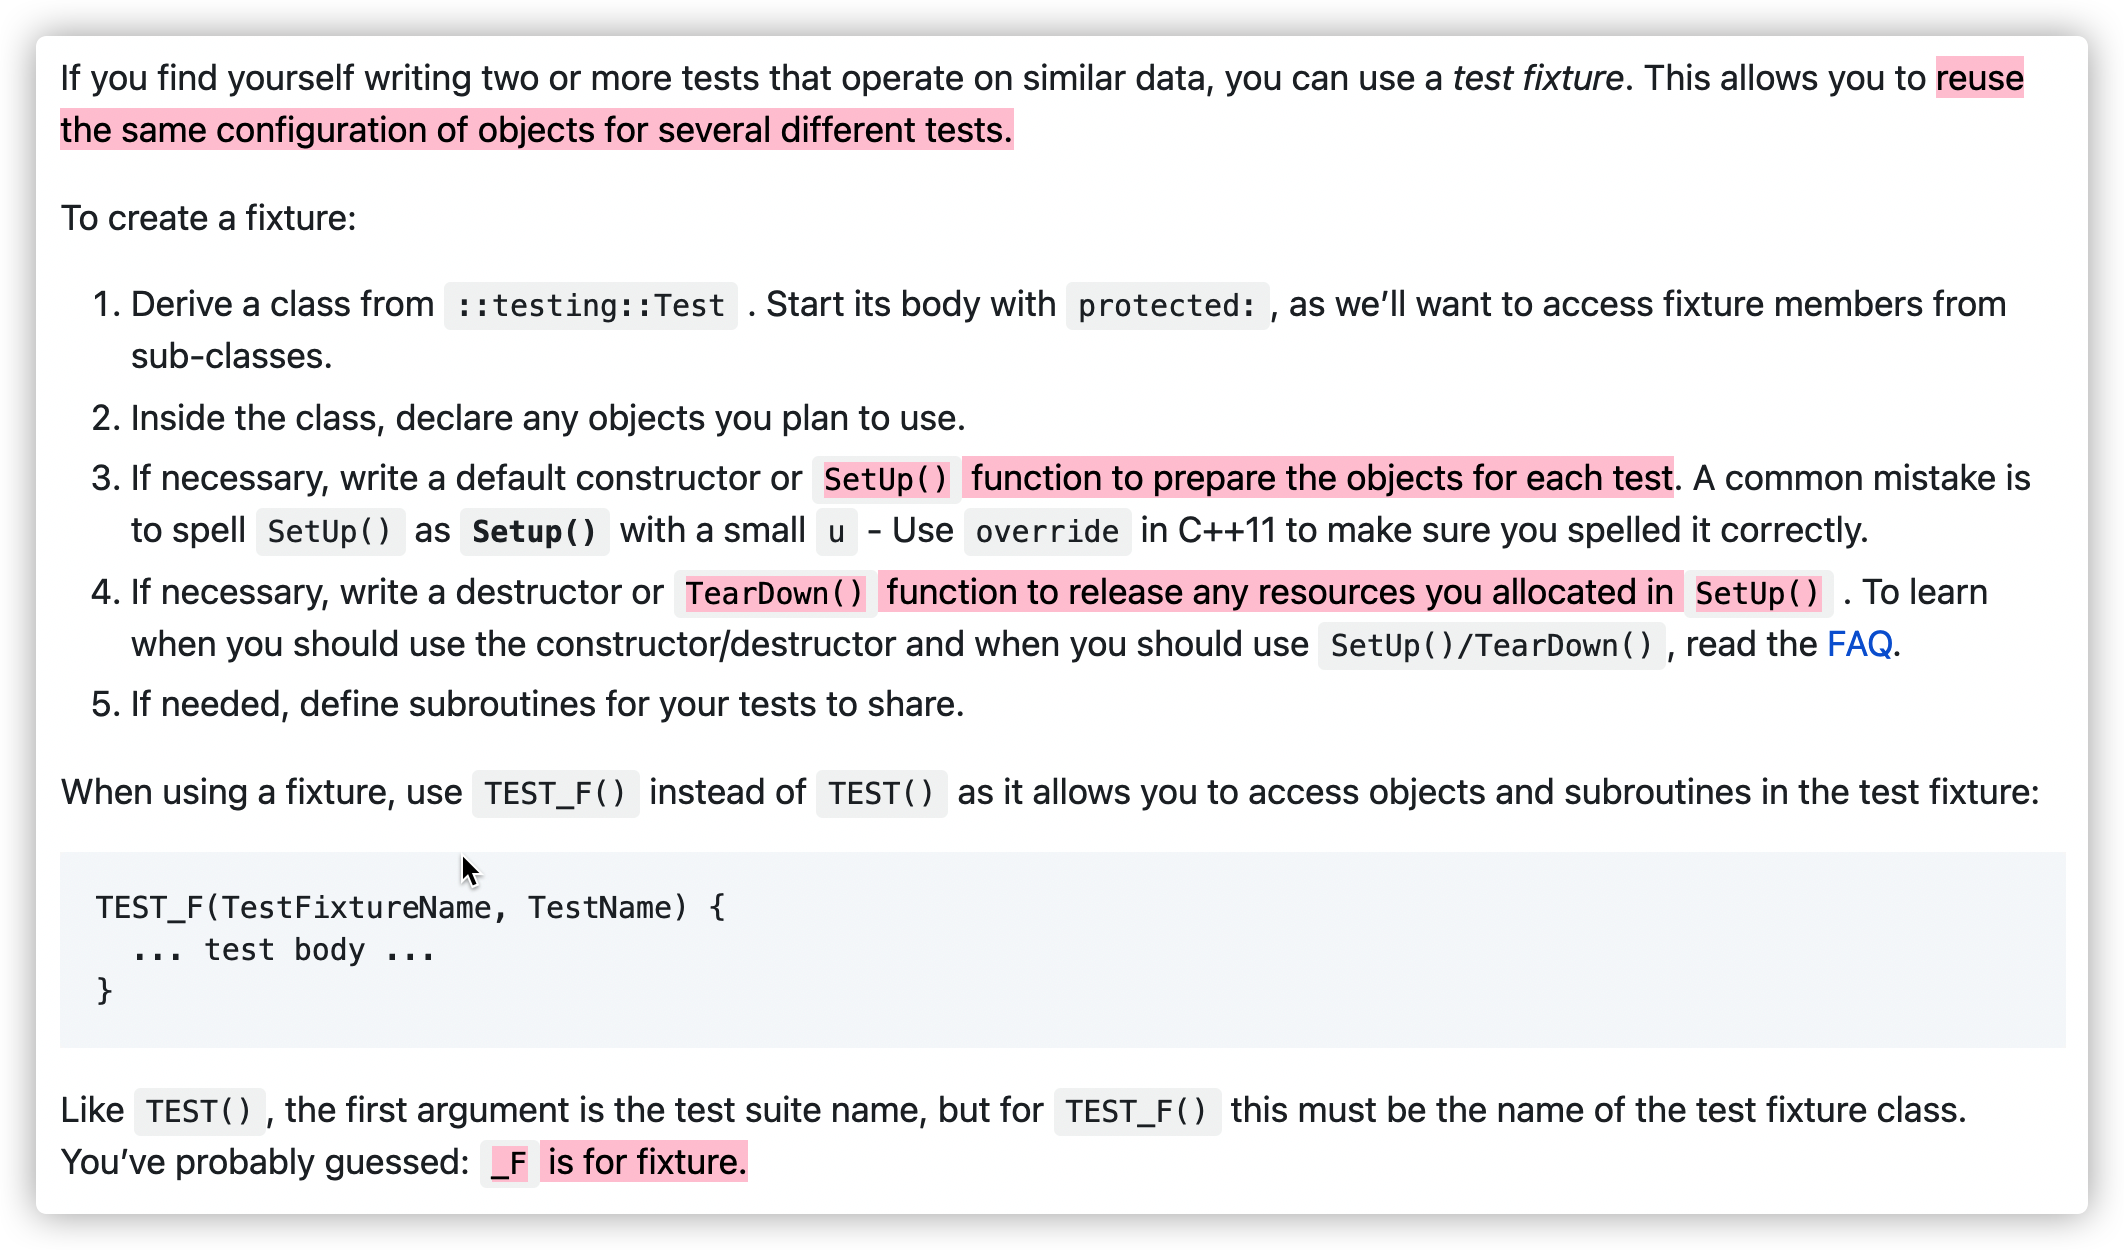
- Test Fixtures:Using the Same Data Configuration for Multiple Tests